Choosing the right flooring can feel overwhelming with so many great options available. If you’re considering laminate flooring for your home or project, you’ve come to the right place. Laminate flooring has become increasingly popular thanks to its durability, affordability, and stunning variety of designs that can mimic everything from hardwood to stone. But here’s the thing: not all laminate flooring types are created equal.
In this comprehensive guide, we’ll walk you through everything you need to know about laminate flooring types, from laminate installation methods to design styles, so you can confidently select the perfect flooring for your space.

What is Laminate Flooring?
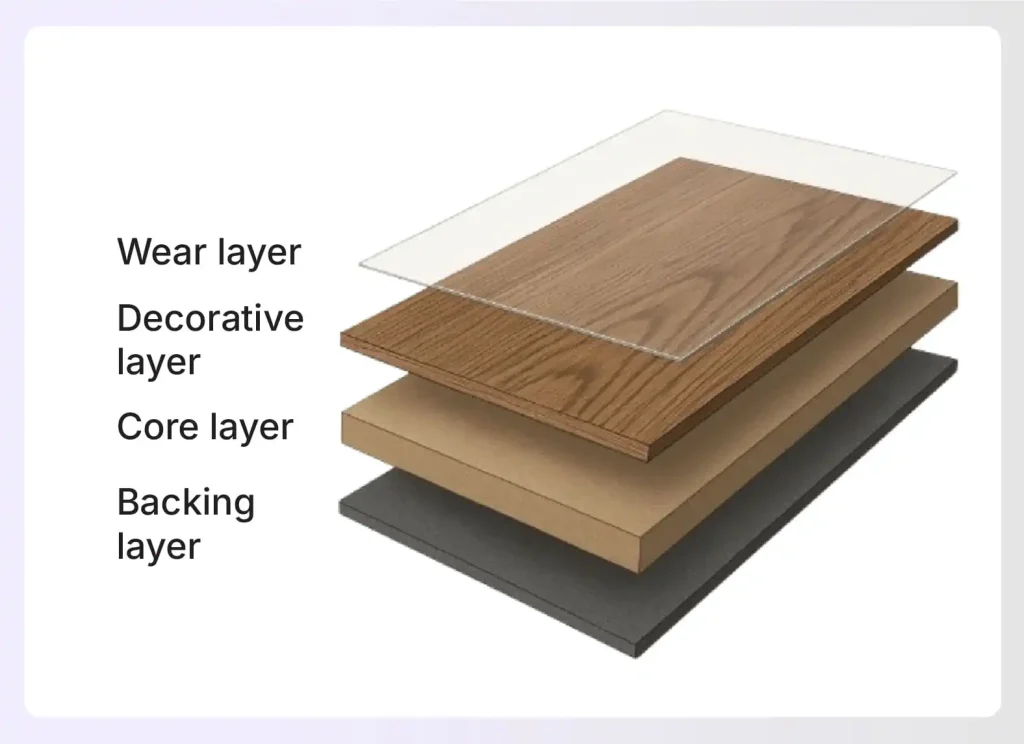
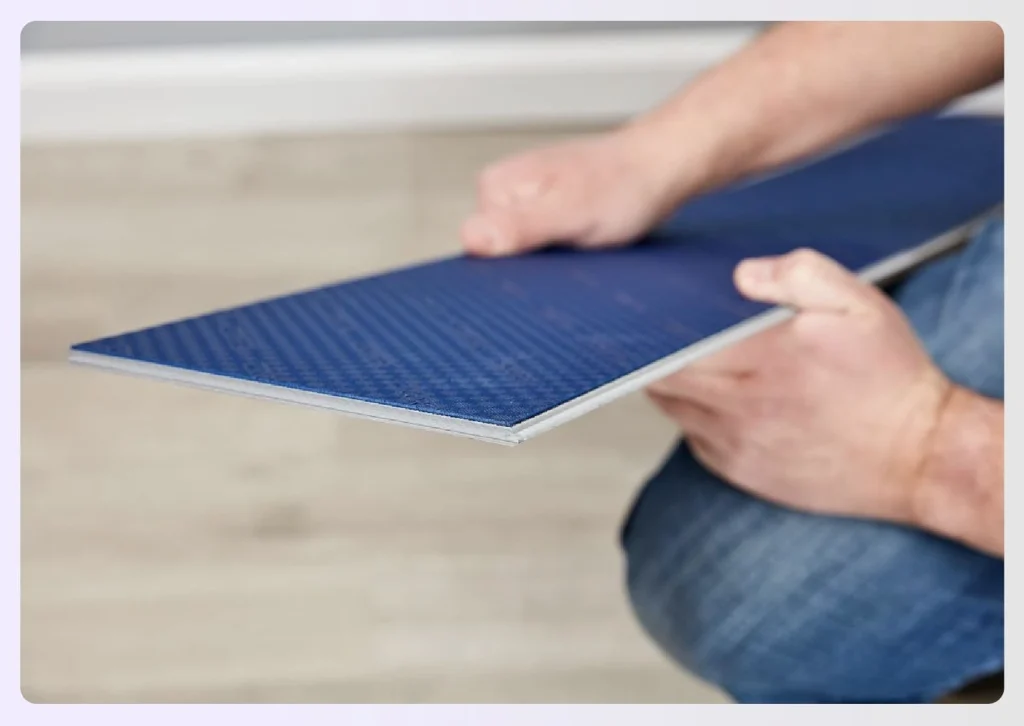
Laminate flooring is a multi-layered synthetic product designed to replicate flooring materials like hardwood, stone, or tile at a fraction of the cost.
It consists of four layers: the wear layer or top layer provides scratch resistance and prevents stains, the decorative layer provides realistic appearance through high-resolution images, the core layer (HDF or MDF) offers structural stability, and the backing layer adds moisture resistance.
What makes laminate flooring so appealing is its combination of affordability, high durability, and versatility. It’s easier to install than hardwood, more budget-friendly than natural stone, and comes in endless styles to match any design aesthetic.
Now that you understand what laminate flooring is and how it’s made, let’s explore the different laminate flooring types based on installation methods.
3 Main Installation Methods for Laminate Flooring
When it comes to laminate flooring, the installation method is one of the most important distinctions between types. Let’s break down the three main categories you’ll encounter:
1. Traditional Glue-Down Laminate Flooring
Traditional glue-down laminate flooring is exactly what it sounds like. Planks that are secured to the subfloor using adhesive. This method creates an extremely strong, permanent bond between your flooring and the surface beneath.
How it works: You’ll apply a specialized flooring adhesive to either the subfloor or the planks themselves (depending on the product), then press the laminate firmly into place. Once the adhesive cures, your floor becomes a solid, unified surface.
Best for: Commercial spaces, high-traffic areas in homes, and situations where you want maximum stability and longevity. This type is particularly popular in retail environments, offices, and busy family homes.
Pros:
- Creates the most durable, long-lasting installation
- Excellent for high-traffic commercial applications
- Minimal risk of planks separating or shifting over time
- Generally quieter underfoot than floating floor installations
Cons:
- More complex and time-consuming to install
- Requires professional installation in most cases
- Difficult and messy to remove if you want to replace the flooring
- Permanent installation means you can’t take it with you if you move
2. Click-Lock Laminate Flooring
Click-lock laminate flooring has revolutionized the DIY flooring market. This innovative system features specially designed edges that interlock together without any nails, glue, or staples required.
How it works: Each plank has a tongue-and-groove edge designed to snap together with neighboring planks. You simply angle one plank into another, press down, and hear a satisfying “click” when they lock into place. The entire floor “floats” over the subfloor without being permanently attached.
Best for: DIY enthusiasts, rental properties, rooms with existing flooring, and anyone who values flexibility. This is by far the most popular type of laminate flooring for residential applications.
Pros:
- Incredibly easy installation, perfect for DIY projects
- No drying time or messy adhesives
- Can be installed over various subfloor types including concrete, plywood, and even some existing flooring
- Easy to remove and reinstall if needed
- Mistakes during installation are easier to correct
- More forgiving on slightly uneven subfloors
Cons:
- May develop gaps or shifts over time if not properly installed
- Can feel slightly less solid underfoot than glued installations
- Requires expansion gaps around room perimeter
- May produce more hollow sounds when walking
3. Laminate Flooring with Attached Underlayment
This type of laminate comes with a pre-attached underlayment layer bonded directly to the bottom of each plank. It typically uses the click-lock installation method but includes the extra cushioning layer as part of the product.
How it works: The underlayment is factory-attached to the planks, eliminating the need to roll out a separate underlayment layer before installation. You install these planks just like standard click-lock flooring, but with one less step in the process.
Best for: Quick installations, rooms above living spaces where sound dampening is important, and projects where convenience is a priority.
Pros:
- Saves significant installation time and effort
- Ensures consistent underlayment coverage with no gaps
- Provides built-in cushioning and sound absorption
- Includes moisture protection in one integrated product
- Often includes thermal insulation properties
- Reduces the risk of underlayment shifting during installation
Cons:
- Typically more expensive than separate plank and underlayment purchases
- Less flexibility in choosing specific underlayment properties
- If the attached underlayment is damaged, you must replace the entire plank
- May not provide as much cushioning as premium separate underlayments
Beyond installation methods, laminate flooring also comes in various styles and designs to match your aesthetic preferences.
Laminate Flooring Types by Style and Design
Wood-Look Laminate Flooring
The most popular category, wood-look laminate delivers hardwood beauty without the maintenance or cost.
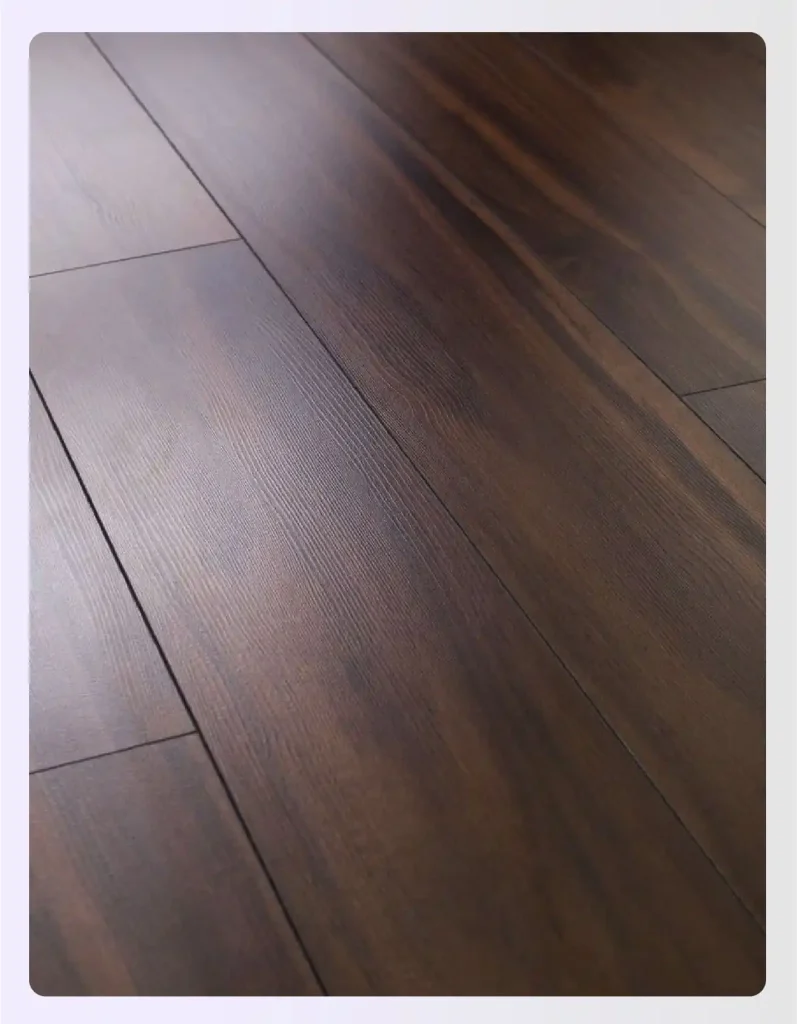
Popular styles include oak, maple, walnut, hickory, pine, and exotic woods like Brazilian cherry. Modern printing captures every detail including grain patterns and knots. Many feature embossed-in-register (EIR) technology where texture aligns perfectly with the printed image.
Best for: Living rooms, bedrooms, dining rooms, hallways, traditional and contemporary interiors
Stone-Look Laminate Flooring
Stone-look laminate brings luxury without the cold feel or difficult installation.
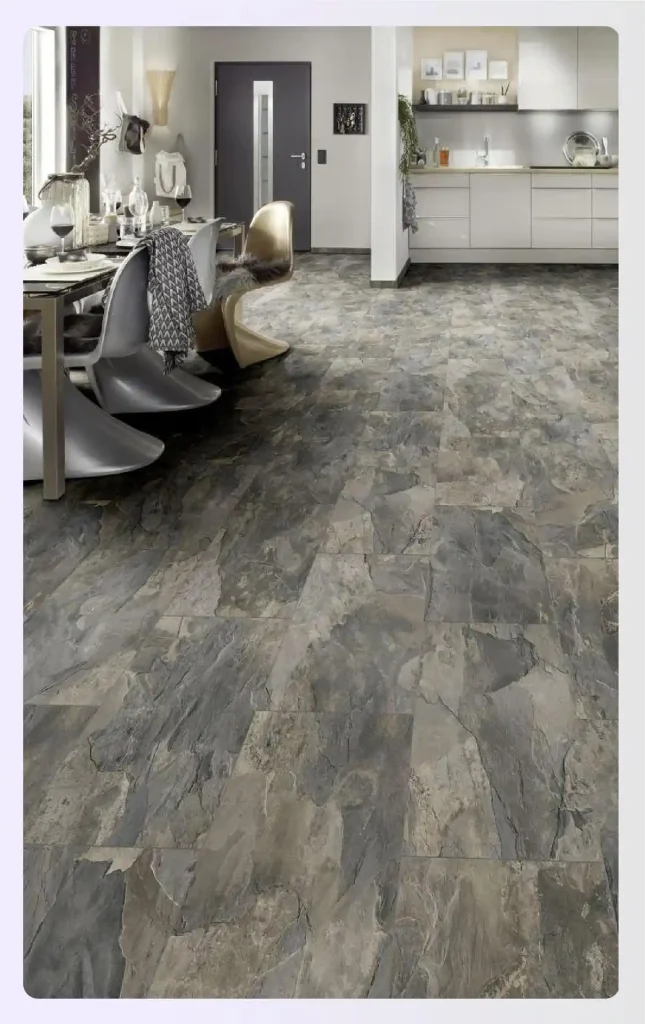
Options include marble, slate, travertine, limestone, and granite. The best products feature realistic texture that mimics natural surface variations while staying warmer and more comfortable than actual stone.
Best for: Kitchens, entryways, open-concept spaces, contemporary and transitional designs
Tile-Look Laminate Flooring
Tile-look laminate replicates ceramic or porcelain tile flooring complete with grout lines, but offers easier installation and a warmer surface.

Styles include ceramic patterns, porcelain reproductions, mosaics, encaustic designs, and subway tile. Many feature beveled edges and realistic grout line impressions.
Best for: Kitchens, laundry rooms, mudrooms, bathrooms
Textured vs. Smooth Laminate Types
Smooth laminate flooring features a glossy finish that reflects light and is easy to clean. It shows scratches more readily and can be slippery when wet. Best for formal spaces and modern designs.
Textured laminate flooring includes hand-scraped, wire-brushed, and distressed finishes that hide wear better and provide better traction. Slightly harder to clean but feels more authentic. Best for high-traffic areas and realistic appearance.
While design and style are important for aesthetics, understanding laminate flooring types by core material is crucial; it’s what determines your floor’s actual performance and durability.
Laminate Flooring Types by Core Material
HDF (High-Density Fiberboard) Laminate
HDF features an exceptionally dense core (800-1,000 kg/m³) with superior water resistance, excellent impact resistance, commendable wear resistance, and minimal expansion. It holds locking mechanisms securely and resists denting.
Best for: Commercial spaces, high-traffic areas, kitchens and bathrooms, homes with pets, basements
MDF (Medium-Density Fiberboard) Laminate
MDF uses less dense core (600-800 kg/m³) that’s more economical. Still provides adequate durability for residential use, easier to cut, and sufficient moisture resistance for most living areas.
Best for: Bedrooms, low-traffic areas, budget renovations, rental properties, DIY installations
Which Core Type is Right for You?
Choosing between HDF and MDF comes down to balancing your specific needs with your budget.
Choose HDF for high-traffic areas, moisture concerns, homes with pets/children, family rooms, long-term installations, and maximum durability.
Choose MDF for tighter budgets, bedrooms and low-traffic areas, short-term living situations, minimal moisture exposure, and good quality without premium pricing.
For most residential applications, quality MDF laminate performs perfectly well. The difference becomes more noticeable in challenging environments or over extended periods. Many homeowners install HDF in high-impact areas like kitchens and entryways, then use MDF in bedrooms to balance cost and performance.
Laminate Flooring Types: Pros and Cons Comparison
Before investing in laminate flooring, it’s important to weigh the advantages and disadvantages of different types of laminate flooring. While all laminate shares common benefits like affordability and easy maintenance, each type has specific strengths and limitations.
Understanding these differences helps you choose the laminate flooring types that best fit your space, budget, and lifestyle needs.
Comparison by Installation Type
| Type | Pros | Cons | Best For |
| Glue-Down | Most durable; Stable; Quieter underfoot; Long-lasting | Requires professional installation; Permanent; Difficult to remove | Commercial spaces, high-traffic areas |
| Click-Lock | Easy DIY; Removable; Works over various subfloors; Affordable | May develop gaps; Feels less solid; Can sound hollow | Residential spaces, DIY projects, renters |
| Attached Underlayment | Quick installation; Built-in cushioning; Excellent sound dampening | More expensive; Less customization; Can’t replace underlayment alone | Multi-story homes, quick projects |
Comparison by Core Material
| Core Type | Pros | Cons | Best For |
| HDF | Superior moisture resistance; Excellent durability; Minimal expansion | 15-30% more expensive; Heavier; Harder to cut | High-traffic areas, kitchens, homes with pets |
| MDF | More affordable; Easier to cut; Good value | Less moisture-resistant; Shorter lifespan | Bedrooms, low-traffic areas, budget projects |
With a clear understanding of what laminate offers, you’re ready to make an informed decision. Let’s look at how you can choose the best from the different types of laminate floors.
How to Choose the Best Laminate Flooring Type
Selecting the right type from all available laminate flooring types depends on four key factors: where you’ll install it, how much moisture it’ll face, the durability you need, and your budget. Here’s how to match laminate types to your specific situation.
Consider Your Room and Traffic Level
Different rooms have different demands. Match your laminate type to the traffic level for best results.
| Area Type | Recommended Specs | Why It Matters |
| Low-Traffic (Bedrooms, guest rooms, closets) | MDF core, AC2-AC3, budget-friendly | Light use means standard options perform well and save money |
| Medium-Traffic (Living rooms, dining rooms, hallways) | HDF core, AC3-AC4, 12 mil+ wear layer, textured surface | Moderate wear requires better durability; texture hides minor scratches |
| High-Traffic (Kitchens, entryways, commercial) | HDF core, AC4-AC5, maximum wear layer, textured finish | Heavy use demands premium durability; consider glue-down installation |
Homes with pets need textured, high-AC-rated laminate since scratches show less. Homes with children benefit from attached underlayment for cushioning and noise reduction.
Moisture Resistance Requirements
Water is laminate’s biggest enemy. Choose your type based on expected moisture exposure.
- Dry rooms (bedrooms, living rooms, closets): Standard laminate with basic moisture resistance works fine. Either MDF or HDF core is suitable.
- Moderate moisture (kitchens, dining rooms): HDF core with enhanced water-resistant coatings is essential. Act quickly on spills, especially near seams.
- High moisture risk (bathrooms, laundry rooms, basements): Only use laminate specifically rated for bathroom use with HDF core and sealed edges.
No matter how moisture-resistant your laminate is, never allow standing water to remain on the surface. Even “water-resistant” laminate can be damaged if water sits for extended periods or seeps into seams.
Understanding AC Ratings by Laminate Type
AC ratings measure durability on a scale from 1 to 5. Higher numbers mean tougher floors that last longer.
| AC Rating | Durability Level | Lifespan | Best Use |
| AC1 | Moderate residential | 5-10 years | Bedrooms, closets only |
| AC2 | General residential | 10-15 years | Bedrooms, home offices |
| AC3 | Heavy residential | 15-20 years | All residential rooms (most popular) |
| AC4 | General commercial | 20-25+ years | Busy homes, offices, active families |
| AC5 | Heavy commercial | 25-30+ years | Ultimate durability, commercial spaces |
Budget vs. Quality Trade-offs
Laminate ranges from $0.50 to $5.00+ per square foot. Here’s what you get at each price point.
| Price Range | What You Get | Best For |
| Budget ($0.50-$1.50/sq ft) | MDF core, 6-8 mil wear layer, AC1-AC2, 5-10 year warranty | Temporary solutions, very low-traffic areas, tight budgets |
| Mid-Range ($1.50-$3.00/sq ft) | HDF or quality MDF, 8-12 mil wear layer, AC3-AC4, 15-20 year warranty | Best value for most homes, good balance of cost and quality |
| Premium ($3.00-$5.00+/sq ft) | HDF core, 12+ mil wear layer, AC4-AC5, EIR textures, lifetime warranty | Long-term homes, high-traffic areas, maximum performance |
Many homeowners invest in premium laminate for high-impact areas like kitchens, living rooms, and hallways, then use mid-range in bedrooms and offices. This balances budget with performance where it matters most.
With these factors in mind, you’re ready to select the perfect laminate type and move forward with installation.
How to Install Different Laminate Flooring Types
Laminate flooring installation methods vary by laminate flooring types, but the preparation steps remain largely the same. Whether you’re tackling this as a DIY project or just want to understand the process, here’s what’s involved.
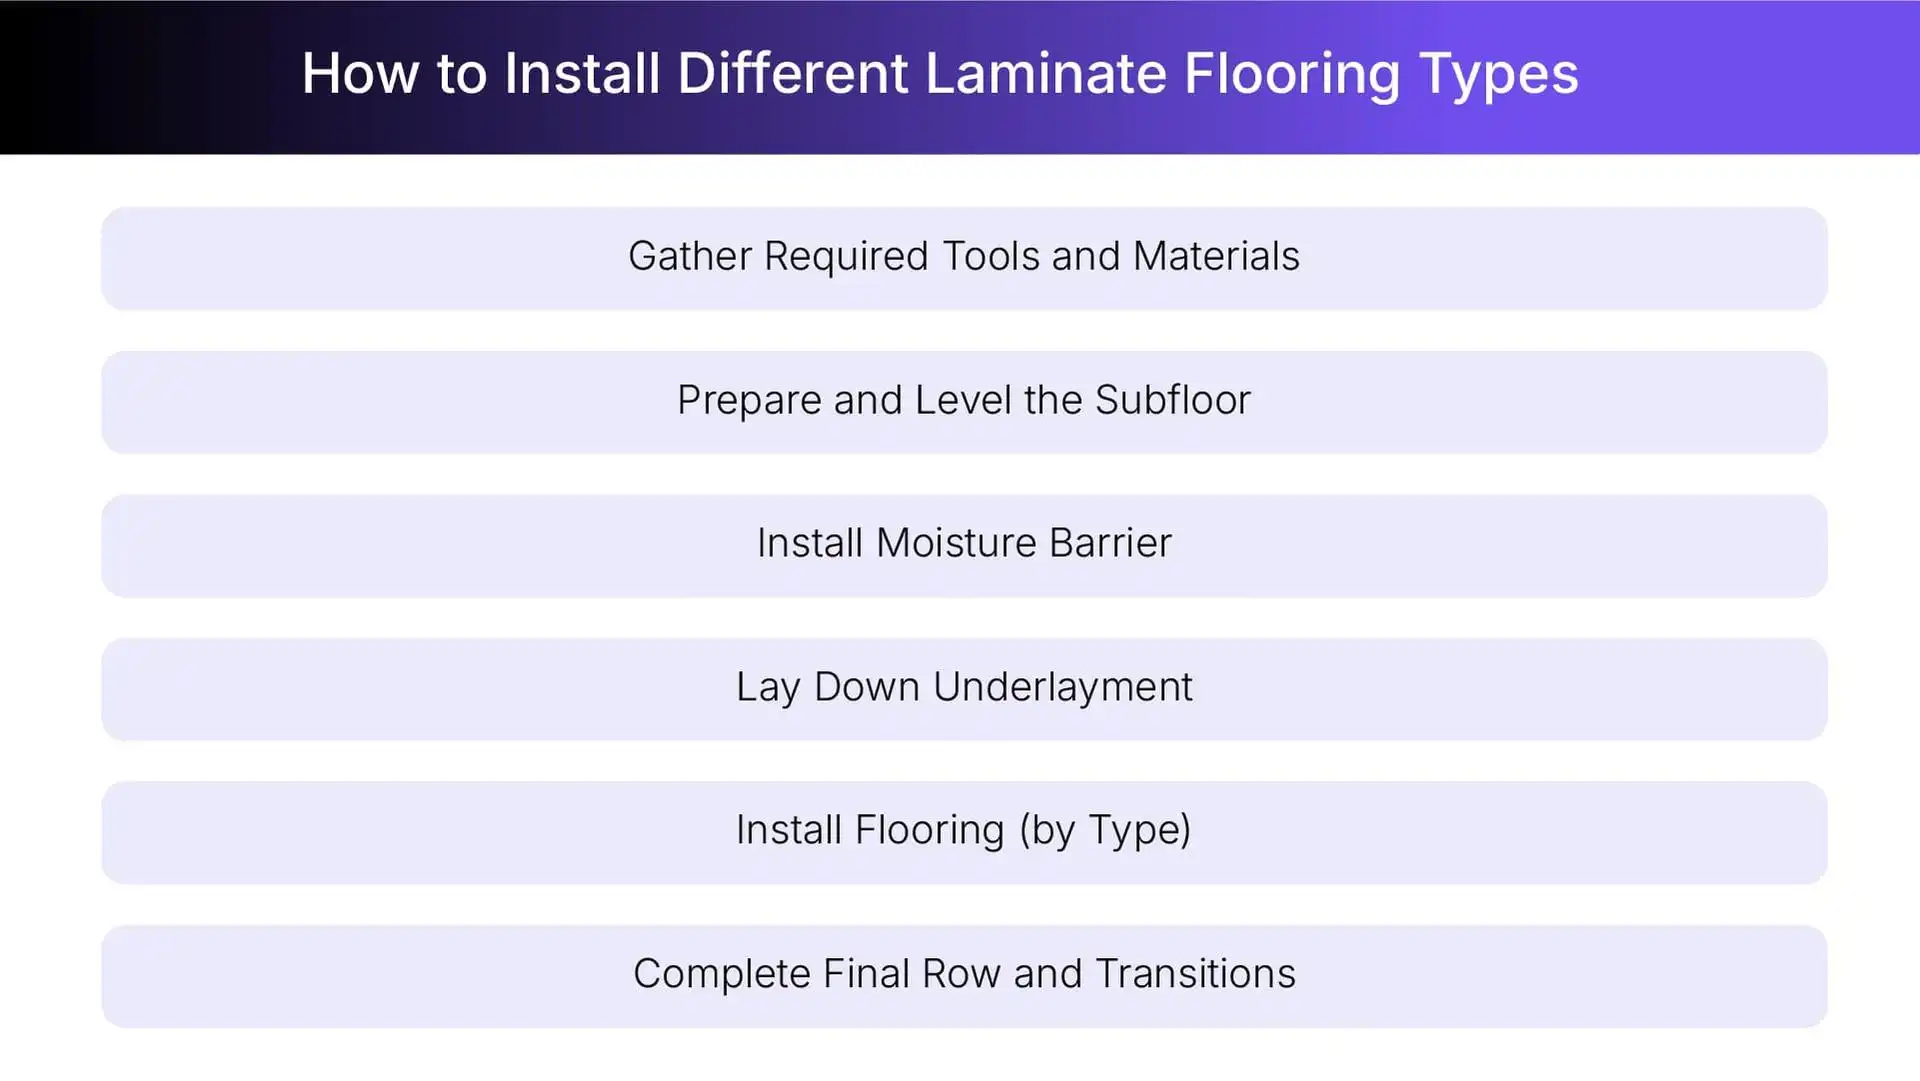
Step 1: Gather Required Tools and Materials
Before starting, make sure you have everything on hand.
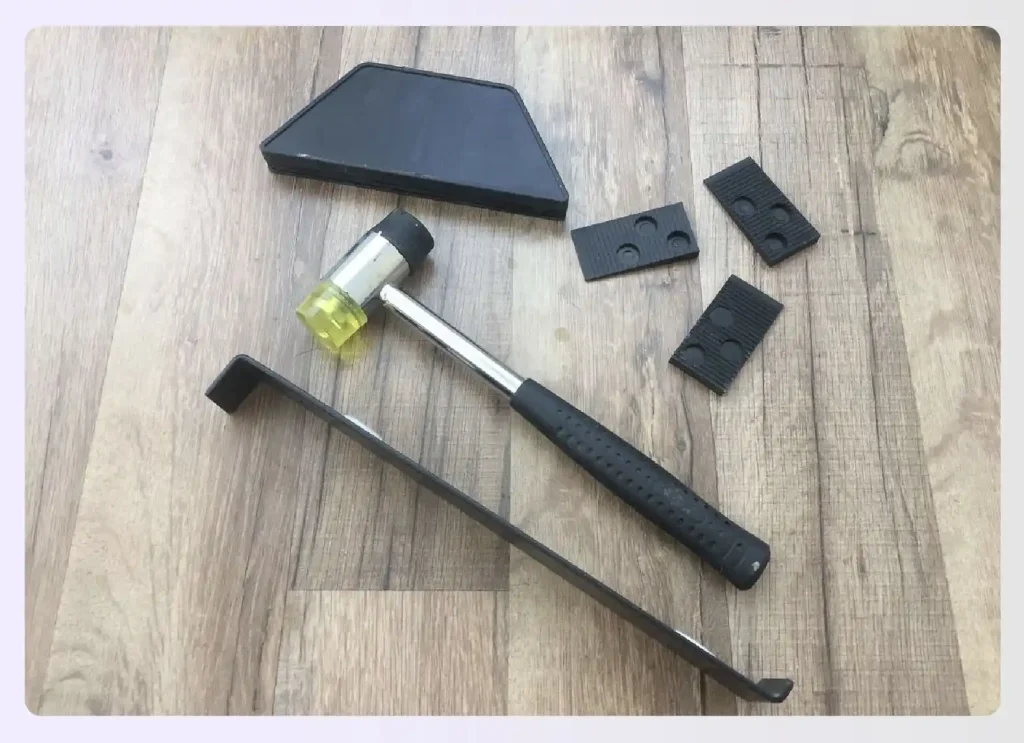
Essential tools:
- Tape measure, utility knife, tapping block, pull bar, rubber mallet
- Pencil, miter saw or circular saw, jigsaw
- Pry bar, 4 to 6 foot level, spacers (1/4 or 3/8 inch)
 Materials needed:
- Laminate planks (plus 10% extra)
- Moisture barrier (if not already on subfloor)
- Underlayment (unless using attached type)
- Transition strips, baseboards or molding
- Construction adhesive (glue-down only)
Safety gear: Safety glasses, dust mask, hearing protection when using power tools. Optional items like a jamb saw, kneepads, and shop vacuum make the job easier.
Step 2: Prepare and Level the Subfloor
This is the most critical step. A poor subfloor will telegraph through your flooring and can even damage the locking mechanisms.
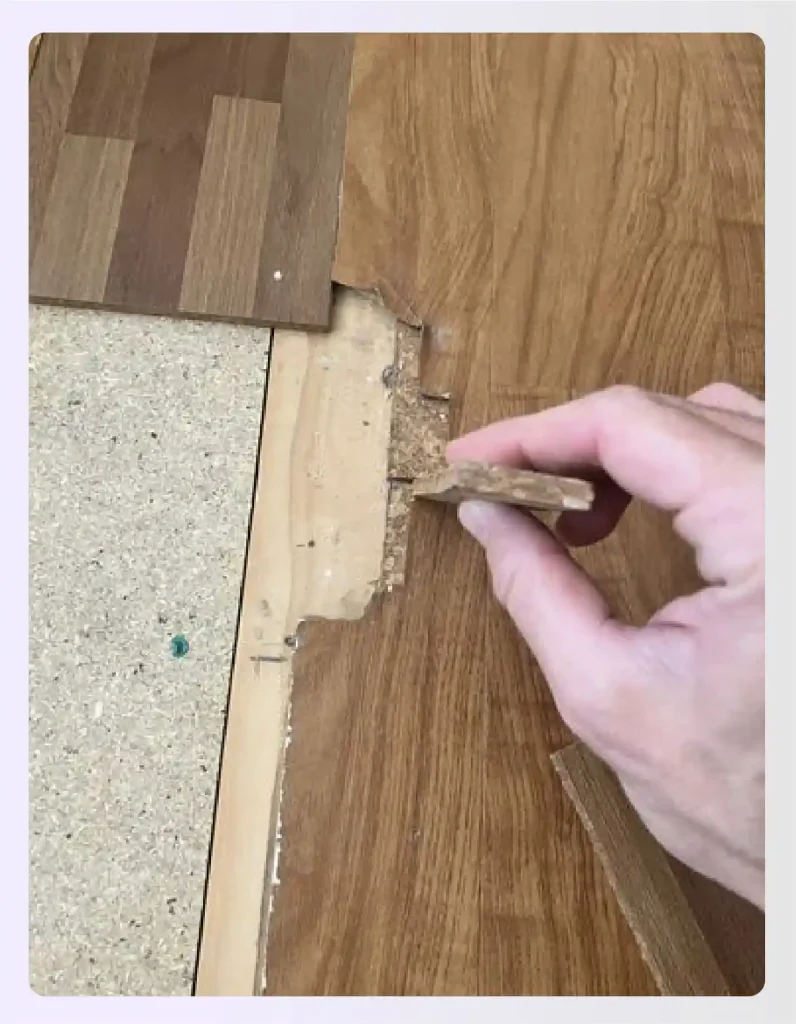 Start by removing existing flooring completely, including all staples, nails, adhesive residue, and tack strips. Sweep and vacuum thoroughly until the surface is completely clean and dry.
Next, check for level using a 6-foot level or straight edge across multiple areas. Laminate requires subfloors level within 3/16 inch over 10 feet. Mark any high or low spots you find.
Address imperfections:
- Sand down or grind high spots until flush
- Fill low spots with floor leveling compound (cure 24 hours)
- Fill cracks with appropriate filler
- Secure loose boards with screws, not nails
For basements and concrete slabs, conduct a moisture test by taping a 2×2 foot plastic sheet to the concrete for 24 to 48 hours. If moisture appears underneath, you’ll need a vapor barrier or must address drainage issues first.
Subfloor requirements: Concrete must be cured at least 60 days and completely dry. Plywood or OSB should be minimum 5/8 inch thick and securely fastened. Some laminate can go over existing vinyl or tile floors if it’s level and secure.
Step 3: Install Moisture Barrier
Think of the moisture barrier as insurance for your floor, especially critical for concrete and basements.
When it’s required:
- Installing over concrete (always)
- Basement installations (always)
- First-floor installations over crawl spaces
- Anywhere ground moisture might be present
The most economical option is 6-mil polyethylene plastic sheeting, though you can also use foam with integrated vapor barrier or premium specialized products.
Roll out the plastic sheeting across your entire floor, overlapping seams by 8 to 12 inches. Run the barrier up the walls about 2 inches and tape all seams with moisture-resistant tape. Trim the excess after your installation is complete.
Step 4: Lay Down Underlayment
Skip this step if you’re using laminate with attached underlayment. Otherwise, underlayment provides cushioning, sound absorption, moisture protection, and smooths minor subfloor imperfections.
 Options include: Basic 2 to 3mm foam for economical cushioning, premium cork with excellent sound dampening, rubber for superior sound blocking in multi-story buildings, or premium synthetic at 3 to 6mm for maximum comfort.
Roll it out perpendicular to the direction you’ll lay your planks. Butt the edges together without overlapping, which would create bumps. Tape seams with the recommended tape, usually included with the underlayment. Trim excess at walls and don’t secure it to the subfloor since it should float.
Step 5: Installation Methods by Laminate Type
 Let your planks acclimate in the room for 48 hours at 65 to 75°F before starting. This allows them to adjust to your home’s humidity levels.
Measure your room and calculate how many rows you’ll need. If your final row will be less than 2 inches wide, trim the first row to make the last row wider. Plan to stagger seams by at least 12 inches between rows.
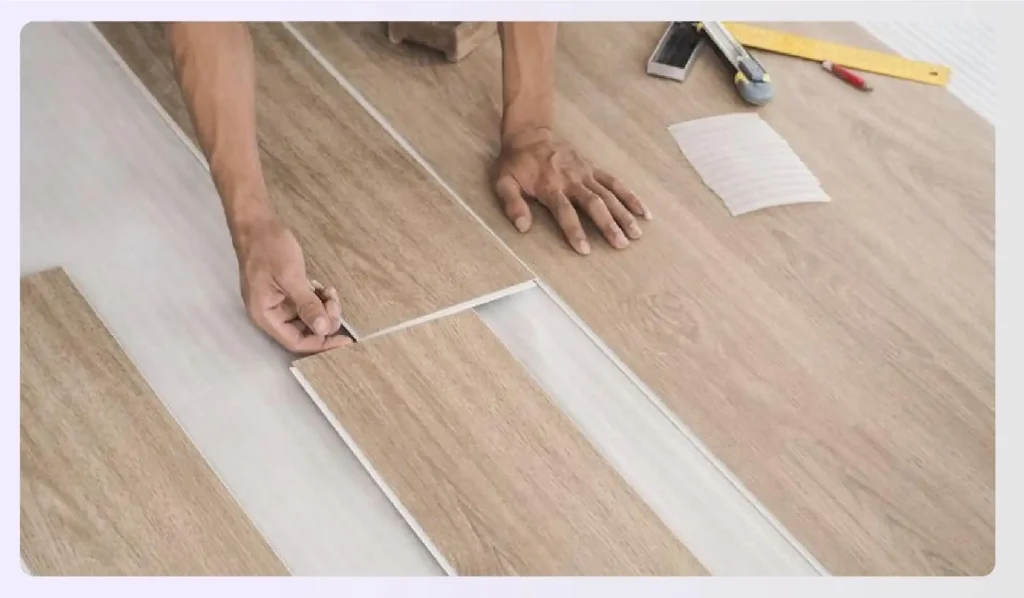
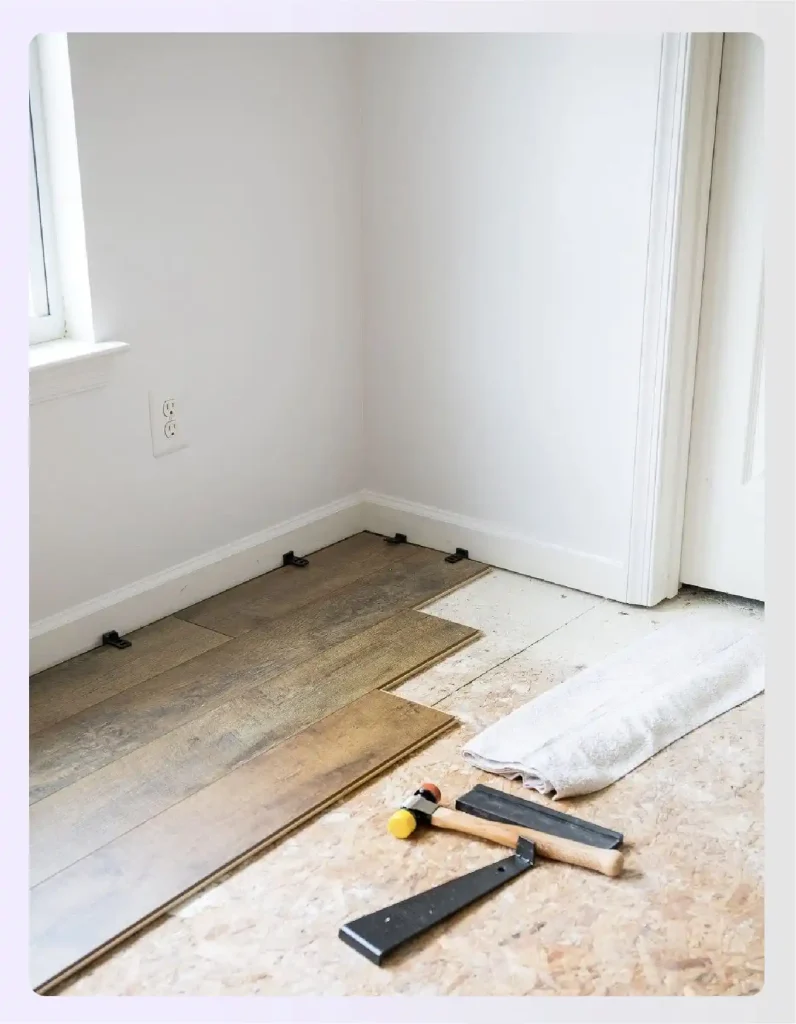
First row installation:
- Remove the tongue edge that faces the wall
- Place spacers (1/4 to 3/8 inch) against wall for expansion gap
- Lay first plank with cut edge against wall
- Snap second plank into end of first plank
- Continue across room, cutting last plank to fit
Subsequent rows:
- Start with leftover piece from previous row (if at least 12 inches)
- Angle new row into previous row at 20 to 30 degrees
- Lower until you hear or feel the click
- Use tapping block and mallet to fully engage locks
- Continue across, staggering seams throughout
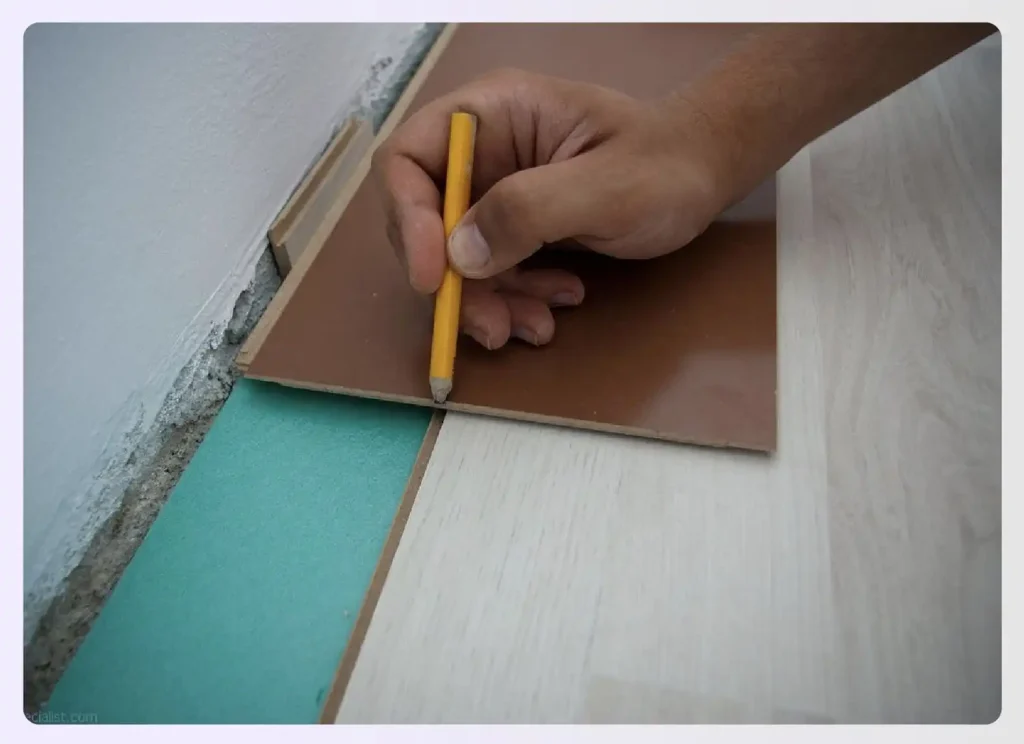
Around obstacles: Measure carefully and mark cut lines. Use a jigsaw for curves and miter saw for straight cuts. A jamb saw works perfectly for undercutting door frames. Always maintain your expansion gap on all sides.
Final row: Measure width needed and cut all planks lengthwise. Use your pull bar to engage this final row into the previous one. This might be tight, so patience matters here.
Glue-Down Installation:
This method follows Steps 1 through 3 above but skips the underlayment since adhesive bonds directly to the subfloor. Apply adhesive with a notched trowel, lay planks immediately, use a 100-pound floor roller to ensure strong bond, and wipe up squeeze-out right away. Allow 24 hours to cure before walking on the floor.
Note that glue-down installation is significantly more complex and usually requires professional help.
Attached Underlayment Installation:
Follow the same process as click-lock installation. The pre-attached underlayment simply makes it slightly easier since you’re managing one less layer.
Step 6: Complete Final Row and Transitions
 Measure the width needed for your final row and cut all planks lengthwise to match. Use your pull bar and hammer to engage the locking mechanism.
Transition strips create smooth, professional-looking transitions between rooms and flooring types:
- T-molding: Between two floors of equal height
- Reducers: Transitioning to lower floor
- End caps: Where laminate meets carpet or ends
- Stair nose: For stairway edges
- Thresholds: For exterior doorways
Measure each transition area precisely, cut the strip to length, position it with ends in the expansion gap, and secure it with a track system or adhesive. Make sure there’s no tripping hazard.
Finishing touches:
- Remove all spacers
- Install quarter-round or baseboards to cover expansion gap (nail to wall only, never floor)
- Walk entire floor checking for loose areas
- Verify all expansion gaps are covered
- Clean floor thoroughly
Wait 24 hours before moving furniture back. Use felt pads under furniture legs and avoid rolling heavy loads across the floor for 48 hours to give everything time to settle properly.
Visualize Laminate Flooring with Foyr Neo
Choosing the right laminate flooring type is easier when you can see exactly how it will look in your space before making a purchase. That’s where Foyr Neo comes in. It’s an intuitive interior design platform that helps you visualize different laminate wood flooring options in your actual room layout.
With Foyr Neo, you can:
Experiment with different laminate types: Upload or select from various wood-look, stone-look, and tile-look laminate designs and see them in your 3D room visualization. Compare oak laminate against walnut, or try stone-look versus wood-look in the same space.
Coordinate with other design elements: Match your laminate flooring with wall colors, furniture pieces, and decor elements to ensure everything works together harmoniously before you commit to purchases. Check out some tips to use the Foyr design tool.
Share with stakeholders: Whether you’re a designer working with clients or a homeowner collaborating with family members, Foyr Neo makes it easy to share visualizations and get feedback on different laminate flooring options.
The platform’s seamless collaboration features make it simple to work with contractors, designers, or family members throughout the selection process. And because everything is cloud-based, you can access your designs from anywhere and make adjustments on the fly.
Ready to see your space with different laminate flooring types? Start your 14-day free trial with Foyr Neo today and transform how you visualize and plan your flooring project.
Frequently Asked Questions (FAQs)
Which laminate flooring is best?
For most homeowners, AC3 or AC4-rated click-lock laminate with HDF core offers the best balance. Look for at least a 12 mil wear layer and a solid warranty. High-traffic areas need AC4-AC5 with textured finish, while budget projects can use AC3 MDF in bedrooms. The premium choice is EIR textured laminate with AC4-AC5 rating and lifetime warranty.
How many types of laminate floors are there?
There are three installation types (glue-down, click-lock, attached underlayment), two core materials (HDF and MDF), and a variety of styles including wood-look, stone-look, and tile-look options. Multiple texture finishes like smooth, hand-scraped, and embossed-in-register create hundreds of combinations.
Is laminate flooring waterproof?
While waterproof laminates are available in the market today, traditional laminate is water resistant, not waterproof. It handles spills cleaned promptly but can’t withstand standing water. The wood-based core swells if moisture seeps through seams. Some newer waterproof laminate flooring options offer enhanced resistance for kitchens, but for bathrooms and truly wet areas, luxury vinyl is the popular choice.
How long do different laminate flooring types last?
Budget laminate (AC1-AC2) lasts 5-10 years, mid-range (AC3) lasts 10-15 years, quality (AC4) lasts 15-25 years, and premium (AC5) lasts 25-30+ years. Actual lifespan depends on foot traffic levels, proper installation, and maintenance habits like using furniture pads and cleaning up spills promptly.
What is the difference between laminate floor types and vinyl flooring?
Laminate has a wood-based core and feels harder like real hardwood flooring, while vinyl flooring is entirely synthetic and feels softer underfoot. Laminate is water-resistant, vinyl is waterproof. Laminate is water-resistant, vinyl is waterproof. Laminate generally looks more realistic, especially for wood appearances. Choose laminate for authentic, solid hardwood looks in dry areas, vinyl for complete waterproofing in bathrooms and basements.
What is the difference between high pressure and direct pressure laminate flooring?
High pressure laminate (HPL) uses extreme pressure (1400+ psi) to pre-fuse layers separately, creating a thicker, more durable wear surface. Direct pressure laminate (DPL) fuses all layers together in one step at lower pressure (300-500 psi), making it cheaper but less durable. HPL is premium and long-lasting; DPL is budget-friendly for light use.